
· Oleksandr Oleniuk · Development · 11 min read
Stop Keeping Developer Tokens in .bashrc: A Practical Linux Workflow with pass and GPG
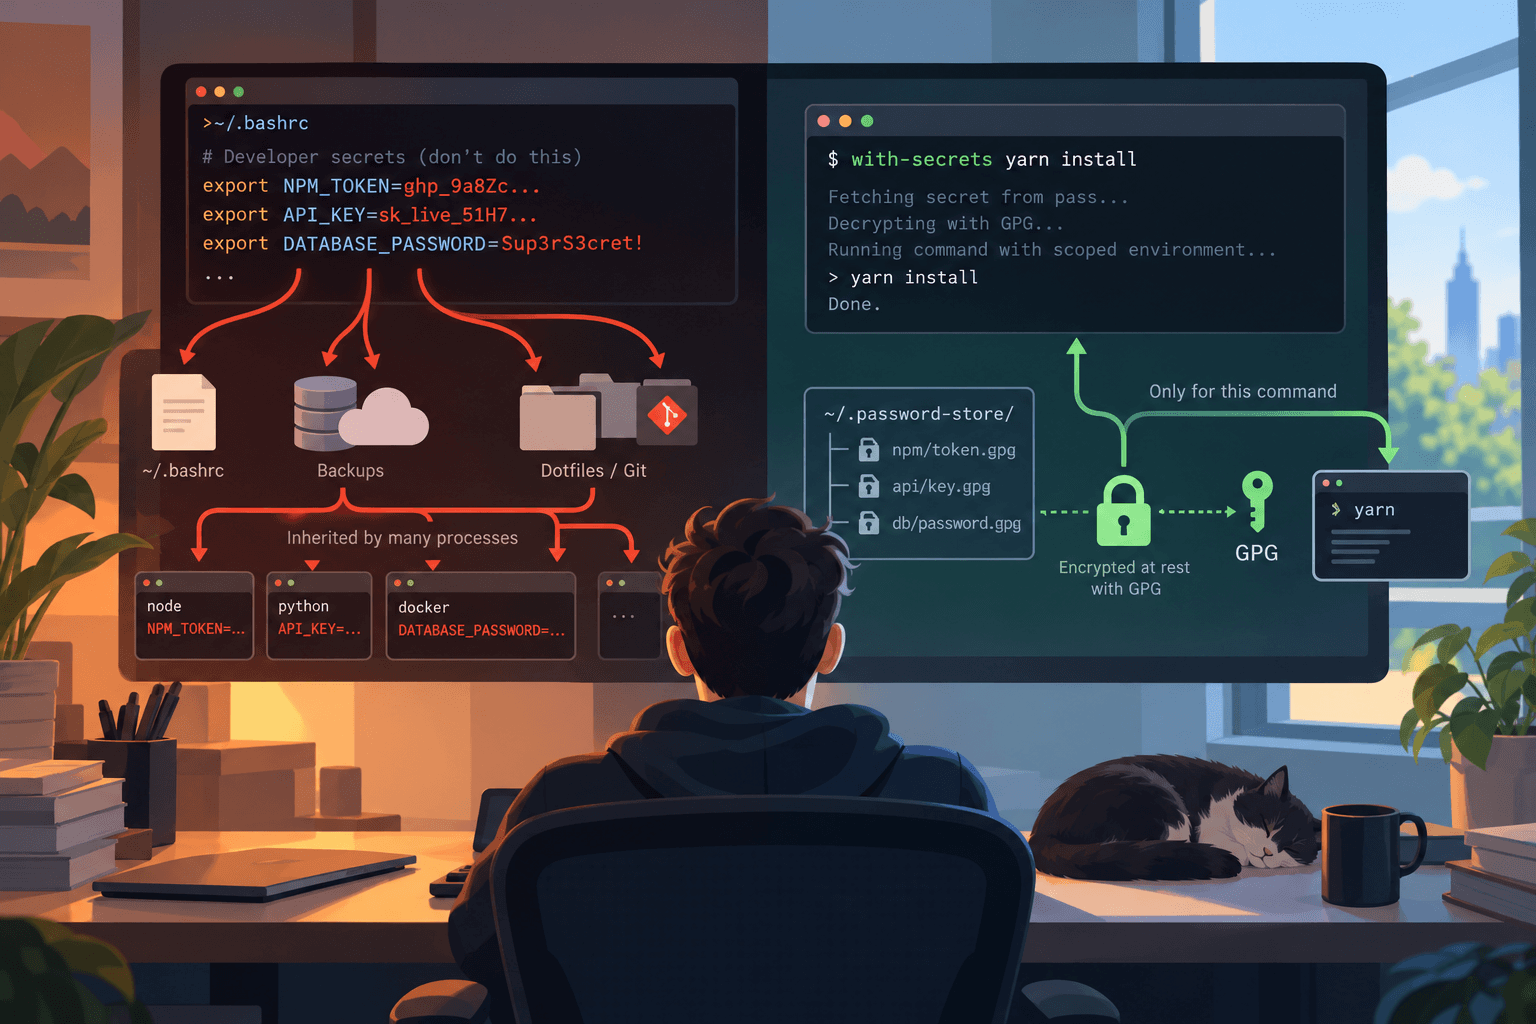
“My laptop stays at home. Nobody is breaking in to steal my npm token.”
Probably true. But opening .bashrc during a screen share requires considerably less planning than a burglary.
Developer credentials tend to settle into whatever file makes the next command work. After npm login, your ~/.npmrc may contain a plaintext token (this example is fictional):
//registry.npmjs.org/:_authToken=npm_example_token_not_real
Other credentials end up in .bashrc, ready for every new terminal:
export API_KEY="..."
export GITLAB_TOKEN="..."
export DATABASE_PASSWORD="..."
Convenient—until those values travel into a dotfiles repository, a backup, or the environment of a program that never needed them.
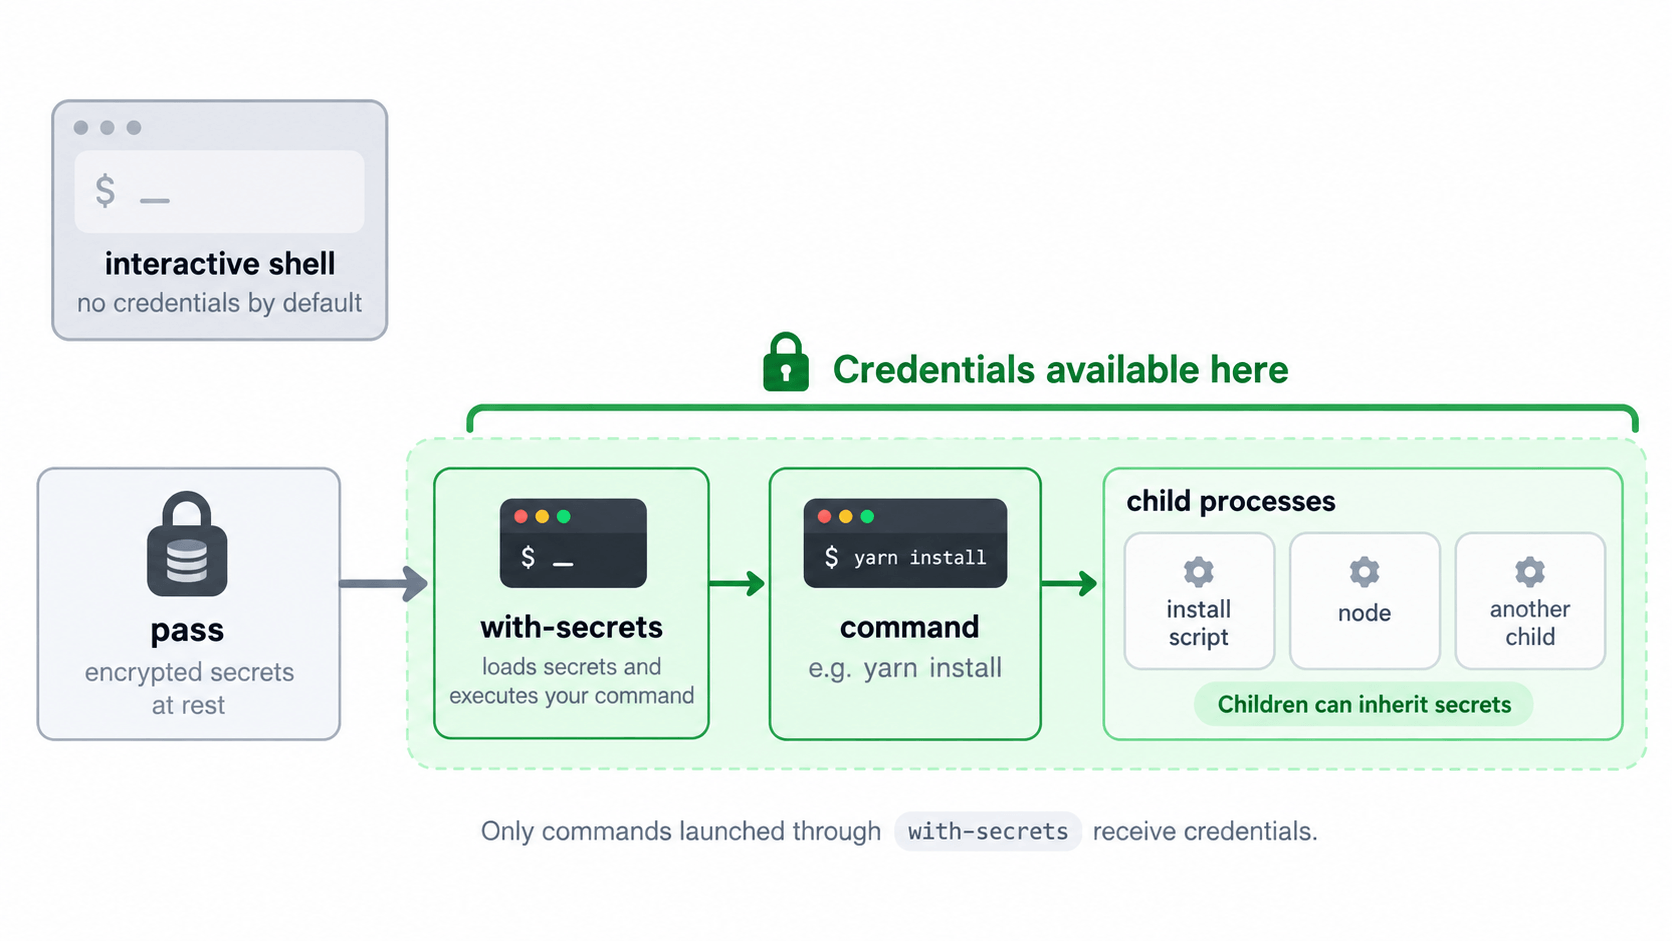
A developer shell should not automatically carry every credential the developer owns. With pass and GPG, you can keep secrets encrypted on disk and retrieve them for the commands that need them.
What This Actually Protects
This workflow reduces plaintext exposure in configuration files and backups, and limits which processes receive credentials. It helps with everyday mistakes: copying a dotfile, sharing terminal output, or exporting a token into every shell.
It does not secure a compromised workstation or protect a credential from the program using it. Malware may request decryption through an unlocked agent, and a receiving process can still log, transmit, or pass the value to its children.
Package-registry tokens are our main example, but a typical workstation has several kinds of secrets worth handling this way:
- Package-registry credentials: tokens for npm, Nexus, or Artifactory, and credentials for private PyPI or NuGet feeds.
- Git hosting tokens: GitHub or GitLab personal access tokens for private repositories and API access.
- Third-party API keys: OpenAI keys, Stripe test keys, or credentials for internal APIs.
- Database credentials: passwords and connection strings for development or staging databases.
- Application encryption keys: keys a local service uses to decrypt its configuration at startup.
Put the Secrets in pass
pass is a command-line password manager that stores passwords, tokens, and other secrets in GPG-encrypted files. Each entry lives under ~/.password-store. Encryption uses your public key; decryption requires the corresponding private key.
Install GnuPG and pass using your distribution’s package manager. Packages are available for Debian, Ubuntu, Arch Linux, and Fedora:
# Debian / Ubuntu
sudo apt install gnupg pass

# Arch Linux (btw)
sudo pacman -S gnupg pass

# Fedora
sudo dnf install gnupg2 pass
Once installed, the workflow is the same across distributions. Create a key if you do not already have a suitable one:
gpg --full-generate-key
gpg --list-secret-keys --keyid-format=long
Choose a key configuration with encryption capability and protect it with a strong passphrase. Copy its full fingerprint from the listing, then replace the placeholder below:
pass init YOUR_GPG_KEY_FINGERPRINT
pass insert dev/northstar-encryption-key
pass insert dev/nexus-northstar-token
pass insert dev/nexus-orbit-token
pass insert dev/npm-personal-token
Enter each secret at its hidden prompt. Use read-only registry tokens for dependency installation, and keep each entry to one line: the secret alone. Do not paste values into the commands themselves, where shell history could record them. These fictional entries match the helper below; use names that fit your projects.
Back up the encrypted store and keep a separate, protected backup of the GPG private key. Test recovery before relying on it. The store alone cannot restore access without the key. Entry names and directory names remain visible, so avoid sensitive details in those names.
Make Decryption Convenient
For terminal prompts, add this to your interactive .bashrc, following the GPG agent setup guidance:
export GPG_TTY="$(tty)"
This variable identifies your terminal; it contains no secret. Ensure your distribution also has a working Pinentry program for the passphrase prompt.
gpg-agent caches your passphrase after you unlock the key, so repeated commands need not prompt every time. Caching is enabled by default. To set its timeouts explicitly, create or edit ~/.gnupg/gpg-agent.conf and add these lines, replacing any existing entries for the same options:
default-cache-ttl 600
max-cache-ttl 7200
These are the documented defaults: a 10-minute idle timeout and a two-hour maximum lifetime. Using a cached entry resets the idle timer, but does not extend the maximum lifetime. Reload the agent to apply the configuration:
gpgconf --reload gpg-agent
The next command that decrypts a secret will prompt for your passphrase and start caching it again. Longer cache times improve convenience while extending the opportunity to decrypt without another prompt. Start with the defaults and adjust only if needed. See the agent cache options and configuration file guidance.
Load Secrets for One Command
Remove the token exports from your startup files. Put this Bash helper in .bashrc instead:
with-secrets() {
  NORTHSTAR_ENCRYPTION_KEY="$(pass show dev/northstar-encryption-key)" \
  NEXUS_NORTHSTAR_TOKEN="$(pass show dev/nexus-northstar-token)" \
  NEXUS_ORBIT_TOKEN="$(pass show dev/nexus-orbit-token)" \
  NPM_PERSONAL_TOKEN="$(pass show dev/npm-personal-token)" \
    "$@"
}

alias ws='with-secrets'
Each assignment supplies an environment variable to the command passed through "$@". Quoting preserves arguments, including spaces. The two application variables read the same stored encryption key because this example assumes local tooling expects it under both names. Match the names to what your applications actually read.
Always pass a command to this helper. This compact version assumes every lookup succeeds: a failed pass show does not prevent the command from starting with an empty value. Add explicit lookup checks if the command must stop when a secret cannot be retrieved.
Open a fresh shell and run:
ws npm install
# Or, in a Yarn project:
ws yarn install
For these invocations, the assignments supply credentials to the command without permanently exporting them into your interactive shell. Descendants can inherit them, and surviving background processes can retain them after the original command exits. This is temporary delivery, not guaranteed erasure.
This convenience helper loads all five variables for every wrapped command. For tighter control, split it into helpers for package installation and application startup, and load only the credentials each project needs. A registry install has no reason to receive an application encryption key or publishing token.
Also remove old exports from existing sessions, or restart the terminal and any IDE that inherited them. The wrapper does not clean an already polluted environment. Keep shell tracing (set -x) off around secret retrieval: it can print expanded assignments.
Keep npm and Yarn Configuration Free of Tokens
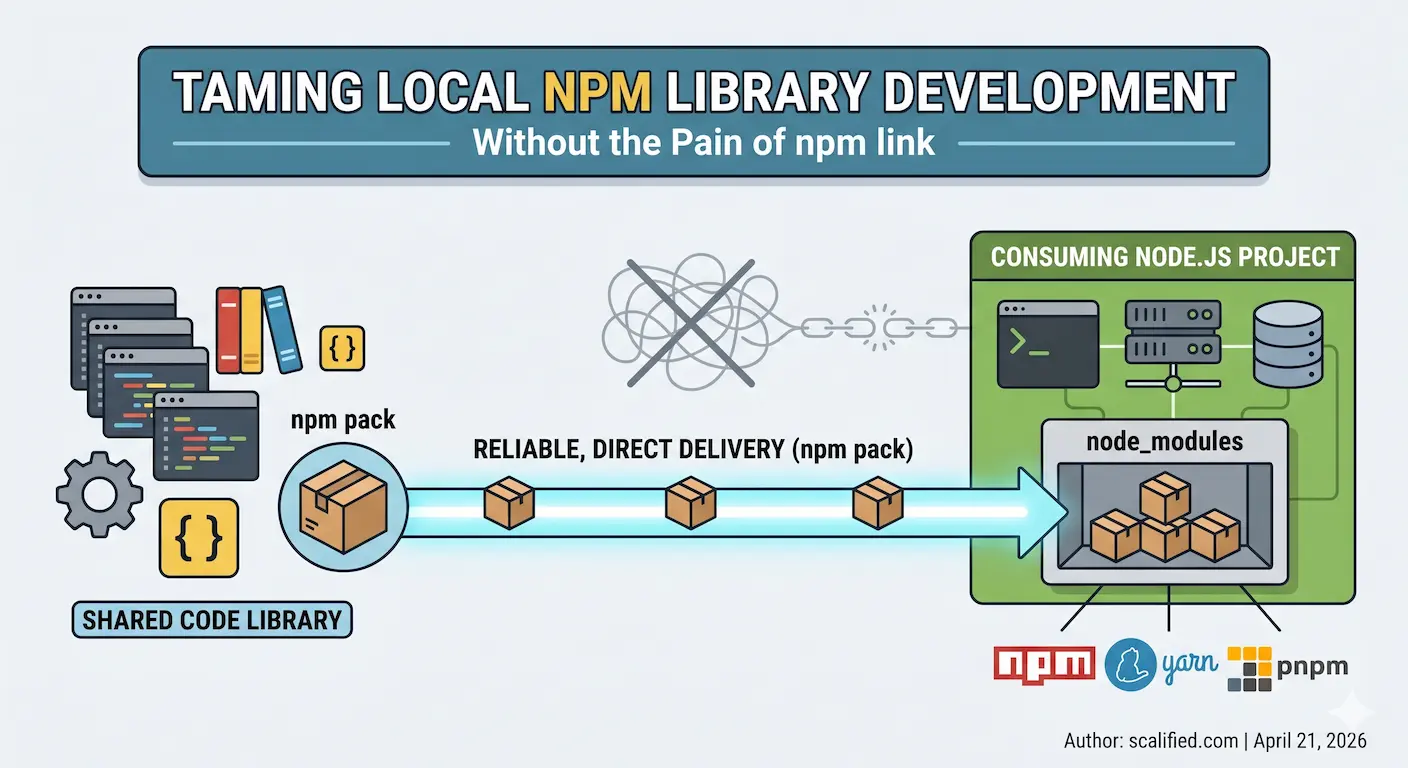
The usual setup starts with npm login: you authenticate with your registry, package installation works, and you get back to development. Behind the scenes, npm saves those credentials in your user configuration file, normally ~/.npmrc. Authentication is sorted, but a plaintext credential is now sitting in an everyday config file.
The next step is to replace that stored value with an environment-variable reference and let the wrapper supply the token from pass. For dependency installation, use the read-only token stored earlier. Remove any existing plaintext credential for that registry from your user configuration too; adding a reference in a project’s .npmrc does not remove the copy in ~/.npmrc.
For npm, a project .npmrc might contain:
//registry.npmjs.org/:_authToken=${NPM_PERSONAL_TOKEN?}
This entry uses the npm public registry and the helper’s NPM_PERSONAL_TOKEN. For a private registry, change the host and variable reference to match it; include the registry path too if it uses one.
The ? tells current npm to substitute an empty string when the variable is undefined. Plain ${NPM_PERSONAL_TOKEN} leaves an undefined reference unreplaced. This example follows the npm v11 configuration documentation; check support if your project pins an older npm release.
For Yarn 4, keep public packages on Yarn’s default registry, or use npm’s public registry directly. Route your private packages to a separate registry. This .yarnrc.yml example uses one fictional company, Northstar:
# Yarn's default public registry
npmRegistryServer: 'https://registry.yarnpkg.com'
# Alternatively, use npm's public registry directly:
# npmRegistryServer: 'https://registry.npmjs.org'

npmRegistries:
  'https://nexus.northstar.example/repository/npm-public':
    npmAlwaysAuth: true
    npmAuthToken: '${NEXUS_NORTHSTAR_TOKEN:-}'

npmScopes:
  northstar-platform:
    npmRegistryServer: 'https://nexus.northstar.example/repository/npm-public'
    npmAlwaysAuth: true
    npmAuthToken: '${NEXUS_NORTHSTAR_TOKEN:-}'
npmRegistries configures authentication for a registry URL. npmScopes routes packages such as @northstar-platform/ui to the private registry; scope names omit the @ here. Other packages use the public registry, where public downloads do not require a token. npmAlwaysAuth: true tells Yarn to send credentials with requests to the private registry, including reads. See Yarn’s configuration reference.
Yarn’s ${NAME:-} form falls back to an empty string when the variable is missing or empty. A bare ${NAME} throws when it is missing, potentially blocking even unrelated build commands during configuration parsing.
The helper already supplies NEXUS_NORTHSTAR_TOKEN from dev/nexus-northstar-token. This project only needs that private-registry credential, so a project-specific helper can omit the other four variables. The example assumes bearer-token authentication.
The daily workflow becomes:
yarn build
yarn test
ws yarn install
The empty fallback does not grant access to private packages. Authenticated operations still need the wrapper; ordinary builds and tests can run without it, provided they do not fetch private dependencies themselves.
What About a Long-Running Service?
A service may need a key once, to decrypt a configuration file at startup. Store that key separately with pass insert work/config-key, then launch the service from a subshell:
(
  CONFIG_KEY=$(pass show work/config-key) || exit 1
  [ -n "$CONFIG_KEY" ] || exit 1
  export CONFIG_KEY
  exec node server.js
)
The application can remove the environment entry after reading it. Here, decryptConfig represents your application’s existing synchronous decryption routine:
function loadConfig() {
  const key = process.env.CONFIG_KEY;
  delete process.env.CONFIG_KEY;

  if (!key) throw new Error('CONFIG_KEY is required');
  return decryptConfig(key);
}

const config = loadConfig();
The service continues using the decrypted configuration in memory. Deleting the environment property reduces accidental exposure in later environment logging and inheritance by subsequently launched children. It does not wipe the local key string, earlier copies, or the decrypted configuration. Perform this step before starting workers or child processes that do not need the key.
The Token Travels with the Process Tree
ws yarn install hands a token to more than an HTTP client. Package managers can execute dependency lifecycle scripts:
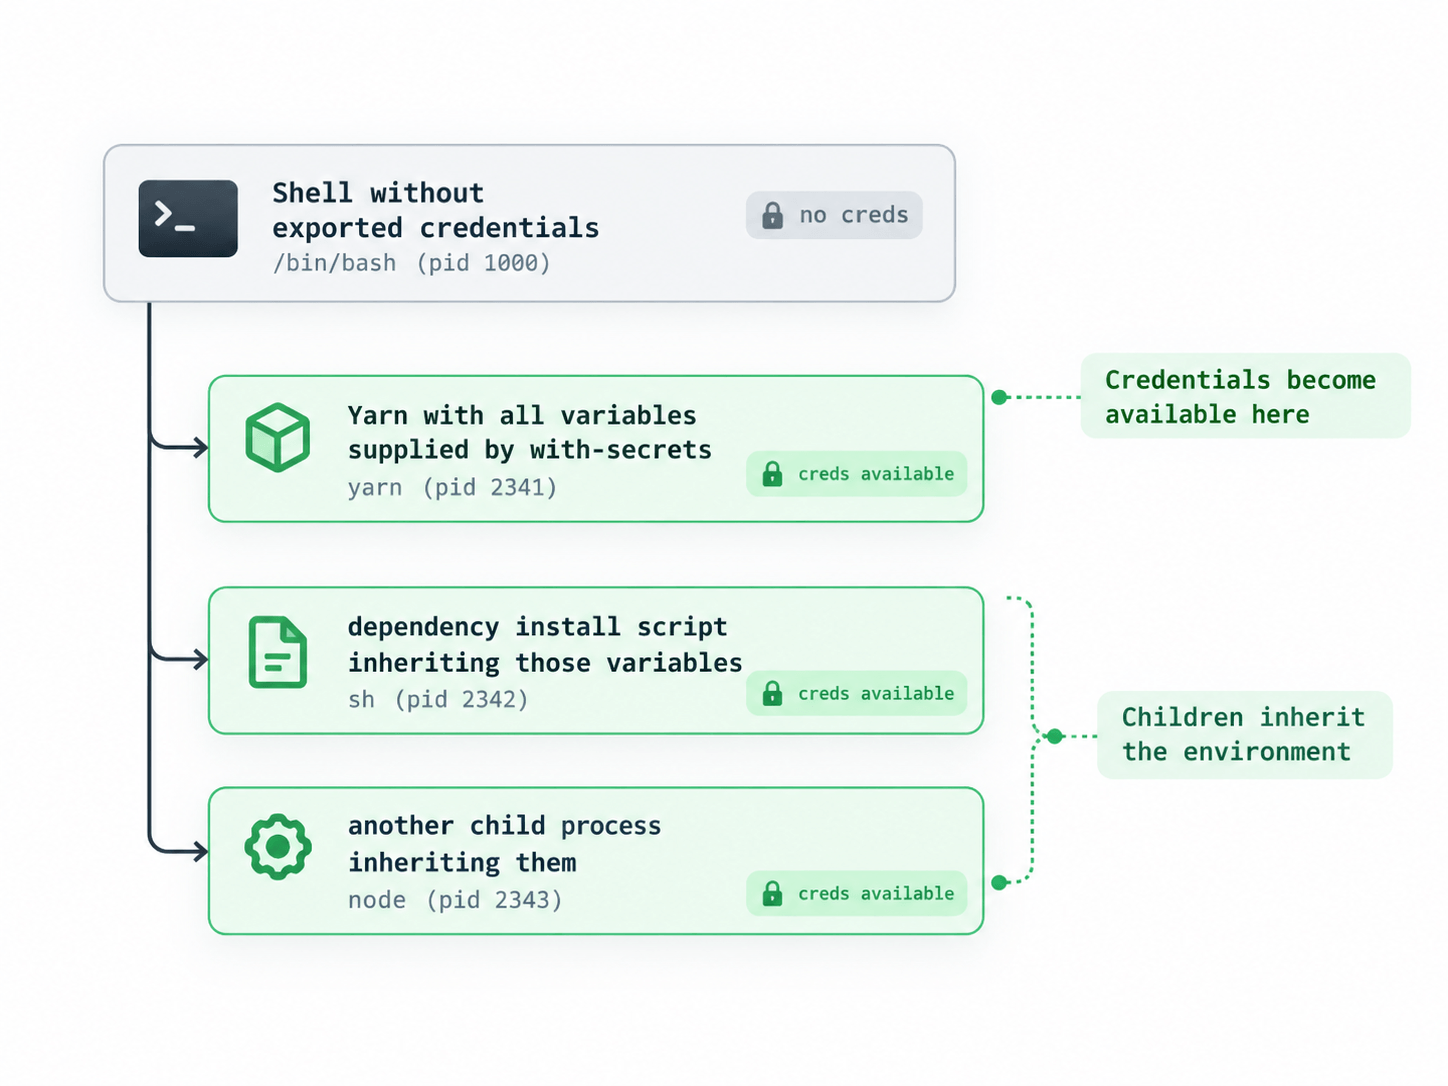
Both npm’s script runner and Yarn’s script environment setup carry the parent environment into script execution. Treat code running during an install as capable of reading the supplied token.
Use a read-only credential limited to the packages you need. Keep publishing credentials in a separate entry and retrieve them only for publishing. npm’s granular token settings support package restrictions, read-only permissions, and expiration. Enable account 2FA too, while remembering that it does not make a stolen bearer token harmless.
Commit lockfiles, review dependency changes, and question unfamiliar or unnecessary packages. Where practical, disable dependency install scripts, accounting for packages that need native compilation or generated files. These measures reduce risk; encrypted storage cannot protect a token from malicious code executing while that token is available.
The Same Workflow on macOS and Windows
The storage tool can change while the workflow stays the same: retrieve a credential when needed and pass it to the process using it.
- macOS: Keychain provides a built-in store for passwords and other secrets. A shell helper can retrieve a stored credential at launch and supply it to a command, keeping the value out of
.zshrcand project configuration. - Windows: PowerShell SecretManagement with SecretStore provides a scripting interface backed by an encrypted local vault. A launcher can retrieve a value with
Get-Secretand put it in the child process’s environment, keeping credentials out of PowerShell profiles and persistent user environment variables. - Across platforms: If you already use 1Password, 1Password CLI offers a convenient alternative. Keep
op://references in an environment file, then useop run --env-file=./dev.env -- yarn installto resolve them and supply the secrets to that command. The file contains references; the actual values stay in your vault until requested.
The same limits apply: the receiving process and its children may read or leak the credentials.
Use Secrets Deliberately in Agent Workflows
A coding agent may need a registry token to install private dependencies. Launching the whole agent through with-secrets, however, gives its session and child processes every credential in the helper. Split the helper so installation receives only the required read-only token, while other commands run without it.
For a simpler workflow, install dependencies yourself through the wrapper, then start the agent from a shell without exported credentials. If it changes dependencies, handle another authenticated installation. Keep secret values out of prompts, generated files, and command output.
Installation scripts still inherit the token. And an agent that can freely invoke pass while your key is unlocked can retrieve secrets itself. The wrapper limits routine exposure; enforcing access restrictions requires controls on the agent’s tools or execution environment.
Keep Secrets Out of Dotfiles
Aliases, helper functions, variable references, and non-sensitive entry paths can live in a dotfiles repository. Actual credentials, secret-bearing .env files, decrypted configuration, private keys, and passwords embedded in URLs belong outside it.
There is a small everyday benefit here, too: once you have removed the sensitive values, you can back up your entire .bashrc without treating it like a vault. It holds your utilities, aliases, and shell preferences, so restoring your familiar setup on a new workstation no longer means copying your credentials along with it.
If a credential was committed or otherwise exposed, revoke or rotate it. Removing the line from today’s file leaves yesterday’s Git history, backups, and copied output untouched.
Before
  .bashrc → plaintext credentials → every shell and its children

After
  pass / GPG → encrypted credentials on disk
  .bashrc → helper functions and aliases
  npm / Yarn config → variable references
  ws <command> → selected credentials for that process tree
Your tools eventually need access to secrets. Make that access deliberate: keep credentials encrypted at rest, unavailable by default, and limited to the commands that need them.